Lowell's Lebanese Pita Recipe
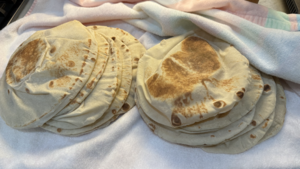
This recipe is my attempt to create authentic Lebanese style pita (these are very thin and designed to be used to wrap around food) but you can also use the same recipe for Greek style pita pockets, you'll just need to roll the dough thicker.
Note: this recipe uses a Zojirushi bread machine to mix and knead the dough, but you could use a stand mixer or your hands to knead it and let the dough rest for an hour before moving on to step 3.
Ingredients
- 350g of hot but not boiling water
- 553g King Arthur bread flour
- 2 teaspoons table salt (not kosher)
- 3 tablespoons sugar
- 1 tablespoon gluten flour (unsure if this is required, but that’s what I went with)
- 1 tablespoon active dry yeast
Instructions
- Put the ingredients into the bread machine in the order listed - make sure the yeast does not touch the water (important)
- Put the pan into the bread machine and select Option 11 (or the dough cycle for your machine)
- When the dough is finished, split it up into ~15 equal balls (this is roughly 65g per ball for me). You might have to tweak the count depending on how thick/big you want them. Don’t go too wide though because they get unwieldy.
- Form the balls as tight as possible, and set them all on a tray to rest for 15 minutes, covered with a towel (I just use parchment instead of a tray). This allows the gluten to settle so you can roll them out.
- Use plenty of flour on your rolling surface!
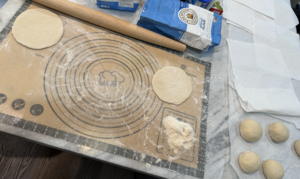
- After resting, roll out a couple of the balls into circles about 6 inches or so. Make sure to flip often so it doesn’t stick, and reflour whenever needed. Set those aside to rest for a few more minutes while you roll out some more balls to 6” and set those aside.
- Go back to the original 6” rolled pitas and roll them out until they are maybe 2-3mm thick for Lebanese style pita- on my rolling surface there’s a circular pattern and a logo and I can just *barely* make out the pattern and logo when they are rolled thin enough. For greek pita, you want them to be a little thicker, maybe almost an 8th of an inch thick. It’ll take some practice to get the feel of it.
- Set aside the rolled pitas on some parchment or wax paper, cover them with a towel, and then finish rolling the rest. I like to use an assembly line where I always have some resting half rolled while I’m rolling more, but it depends on your workspace.
- Put a pan over medium high to high heat and let it get hot - I use a cheap wok but a really flat pan or even a griddle would work if it can get hot enough. Don’t grease it.
- To cook the pitas, starting with the ones that have rested the longest, you’ll put them down, wait about 20-30 seconds until you start seeing a lot of bubbles forming and the bottom side is starting to get a little bit browned. Flip the pita, and hold a big spatula very gently on the top to trap the steam inside (this step is way more important than it seems). Over about a minute, the pita should fill up with air and turn into a ball. Flip it over right away, and then flip it around to let it cook on the various sides and get some nice browning. The whole process should take roughly 2 minutes per pita, maybe 2.5 minutes for greek pita since they are thicker.
- IMPORTANT: Once the pita is finished, put it on top of a double or triple layer towel and then cover with another towel, or multiple towels. The pita need to steam and cool down to turn into the nice soft pita that you are expecting. Stack the next pitas directly on top of the rest and keep it covered.
- Once they are fully and completely cooled down, keep them in a large ziplock bag (I use the 2 gallon style). They will *very* quickly go stale if left out in the air, so make sure to close that bag after you grab one.

